Good to have you back!
This is the continuation of the previous blog Lightning web components - More JavaScript!
In the previous part, we played around with JavaScript and built a Simple Calculator component. In this blog, we will see how we can conditionally render DOM elements.
Let's build a new component. We'll just add a couple of elements to take input from the user, and then we'll make use of conditional rendering to display the data on click of a button.
Let's get the UI rolling.
Let's call our best friend Command Pallate and create a new Lightning Component. I'll name the component employeeDetails, but again, you do you. And also, don't forget to name your component in camelCase. Very important.
<template>
    <lightning-card title="Employee Details" class="slds-text-align_center">
        <div class="slds-p-around_medium">
            <lightning-input type="text" placeholder="Name" onchange={handleName}></lightning-input>
            <lightning-input type="number" placeholder="Phone Number" onchange={handlePhone}></lightning-input>
            <lightning-input type="email"  placeholder="Email address" onchange={handleMail}></lightning-input>
            <lightning-input type="number" name="ctc" placeholder="Expected CTC" onchange={handleCtc}></lightning-input>
        </div>
        <div class="slds-grid slds-p-around_medium">
           <lightning-button class="slds-col" variant="brand" label="Show Details" onclick={handleClick}></lightning-button>
        </div>
    </lightning-card>
</template>
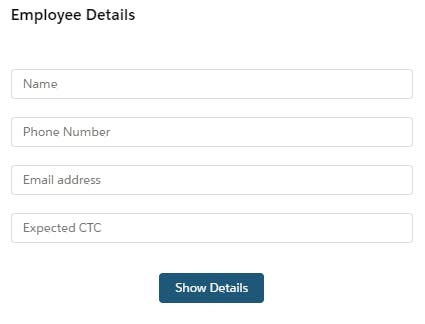
Modify the HTML file, deploy the code to org and you should be able to see something like this.

JavaScript!
import { LightningElement } from 'lwc';

export default class EmployeeDetails extends LightningElement {
    name;
    phone;
    mail;
    ctc;

    handleName(event) {
        this.name = event.target.value;
    }
    handlePhone(event) {
        this.phone = event.target.value;
    }
    handleMail(event) {
        this.mail = event.target.value;
    }
    handleCtc(event) {
        this.ctc = event.target.value;
    }
}
We added the elements in the UI and added methods to handle the input.
Now let's check how to render them with the click of the button.
To render HTML conditionally, add the if:true|false directive to a nested tag that encloses the conditional content. The if:true|false={property} directive binds data to the template and removes and inserts DOM elements based on whether the data is a truthy or falsy value.
Let's modify our HTML file. Add this after closing the <div> tag of the button.
<template if:true={isSelected}>
            <div class="slds-text-align_center">
                <div class="slds-text-heading_medium">Employee Details</div><br/>
                <lightning-formatted-text value={name} ></lightning-formatted-text><br/><br/>
                <lightning-formatted-phone value={phone} ></lightning-formatted-phone><br/><br/>
                <lightning-formatted-email value={mail}></lightning-formatted-email><br/><br/>
                <lightning-formatted-number value={ctc} format-style="currency" currency-code="EUR" ></lightning-formatted-number>
            </div>
        </template>
We'll add one more variable isSelected and add a method to handle the click.
Modify the JavaScript file to add these changes.
   isSelected = false;

    handleClick() {
    this.isSelected = true;
    }
Did you notice how we have used <lightning-formatted-text>, <lightning-formatted-email> etc, in our template? You can read more about them here. If you're too lazy to click, those tags format the data in a certain way. We'll see that in our component.
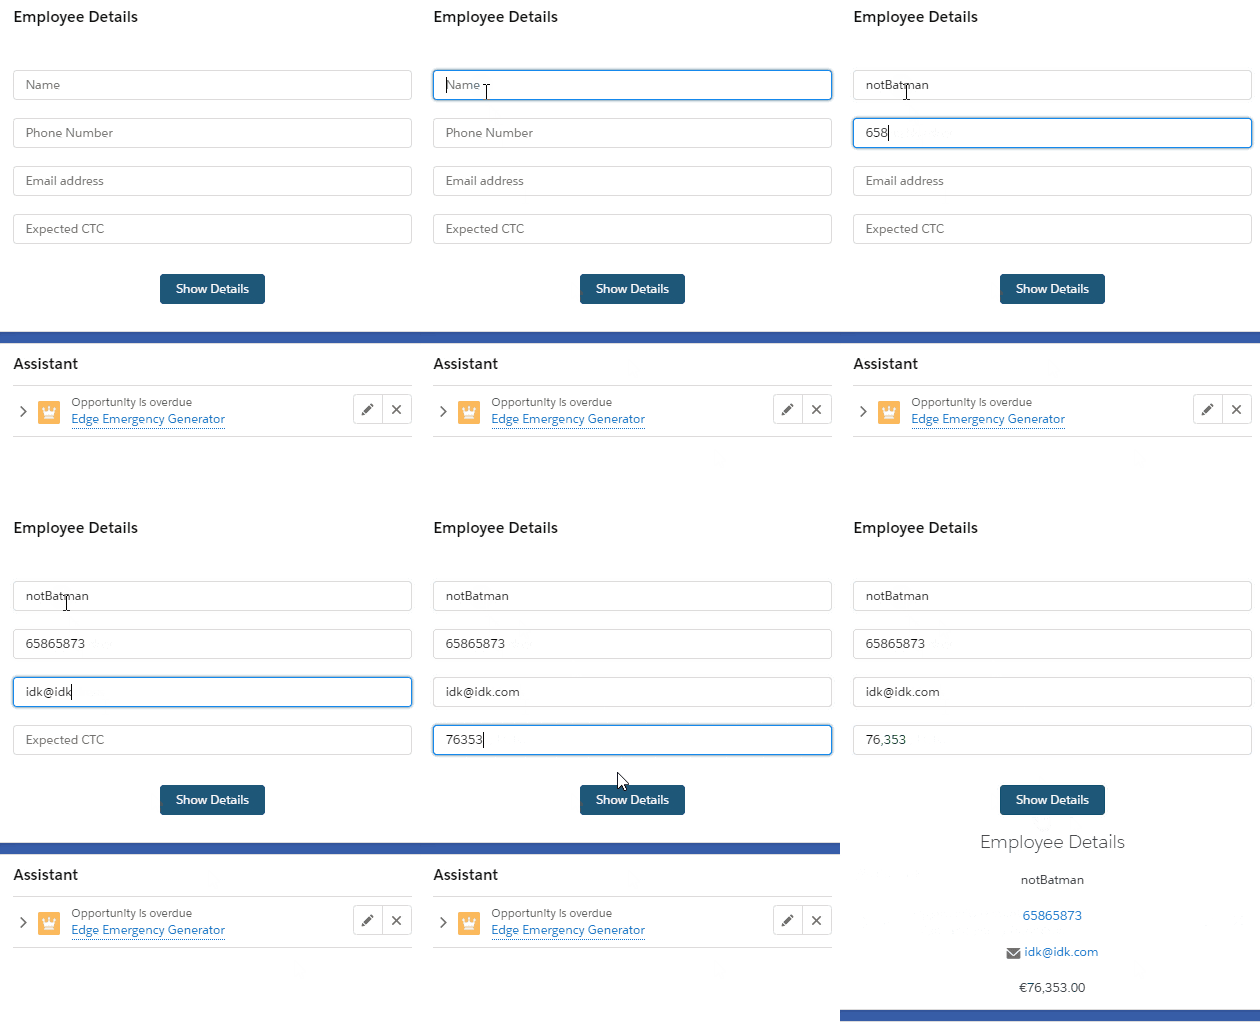
Let's deploy our code and see how it looks.

It works!

Notice how it's displaying E-mail, Phone number and Currency. That's the magic of the 'formatted' tags.
Let's enhance the button.
There is something called the Stateful button. A lightning-button-stateful component represents a button that toggles between states, similar to a Like button on social media. Stateful buttons can show a different label and icon based on their selected states.
Let's modify the HTML file and use a stateful button instead of normal buttons.
Replace the previous button tag with this.
<lightning-button-stateful class="slds-col" label-when-off="Show Details" label-when-on="Hide Details" variant="brand" selected={isSelected} onclick={handleClick}></lightning-button-stateful>
Let's modify the JavaScript to handle this. Replace the old handleClick() method with this one and add another method showDetails().
handleClick() {
        this.isSelected = !this.isSelected;
        showDetails(this.isSelected);
    }
    showDetails(isSelected) {
        if(isSelected) {
            this.isShown = true;
        }
    }
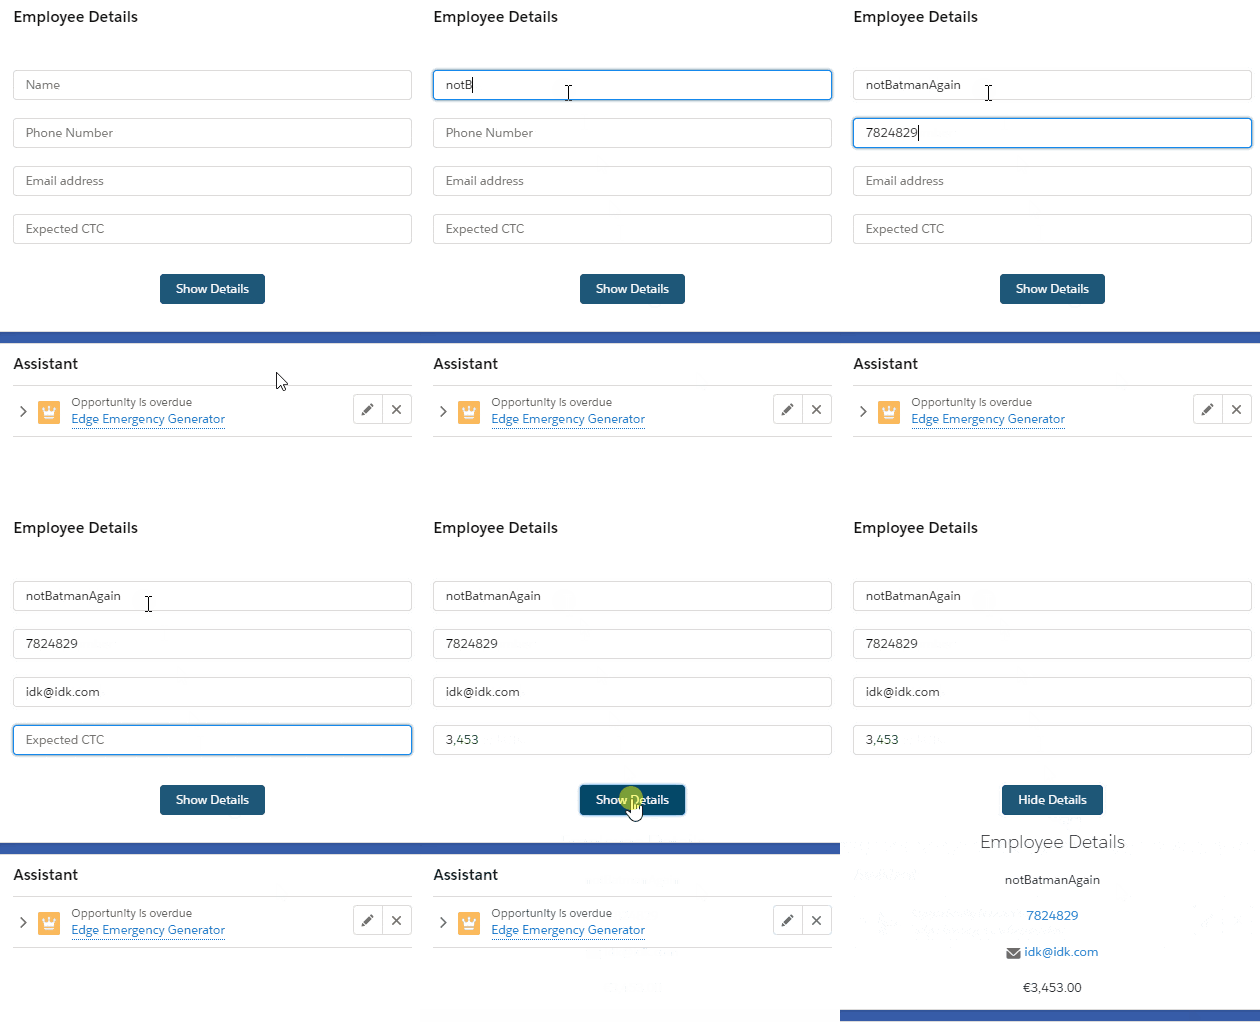
Save and deploy. Let's see the changes.

See what's happening there? It's not just conditionally rendering, but also the label of the button is changing every time we click. Tell me that isn't cool! xD
Well, that's it for this part. We created a new component that takes input from the user, we added a button to conditionally display the data. We also explored the 'formatted' tags and 'stateful button'. In the next one, we'll see how to use an iterator and for each.
If you liked this, follow the series for some more cool stuff on lwc.
Thanks for reading! :D
